 [1] [1] |
Follow @BuildersFan |
In this week’s episode of Home Made Easy, we are focusing on the kids! Tanya makes grass heads, Ryan builds an acrylic glass art board and Elle shows you how to build a toy storage table…
Part 1 – Tanya
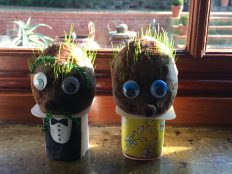
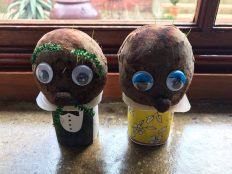
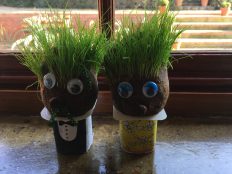
Grass heads [6]
Making grass seed heads is a fun way to encourage your children’s green fingers!
You will need:
| Materials | Tools |
| Silk stockings | Spoon |
| Palm Peat / Coconut Husk | Tea Cups |
| Grass seeds | Scissors |
| Craft Eyes | |
| Metallic pipe cleaner | |
| Small yoghurt tubs (empty) | |
| Patterned tape | |
| Clear glue | |
| Cotton | |
| Paper with tuxedo drawn on it |
Steps:
- Cut the stocking off at knee-height.
- Pull the stocking (toes first into the cup) over the sides of the cup.
- Add a handful of grass seeds into the toe area.
- Fill the rest of the stocking (and cup) up with palm peat or coconut husk.
- Remove the stocking from the cup and tie a knot to form a round ball.
- To create a nose, pinch an area where the nose should sit, and tie some cotton around the raised nose area. This will create a little knob.
- Add the eyes by sticking it with child friendly glue.
- Add some eye brows and a mouth using the pipe cleaner. Cut to size and stick using glue.
- Lastly trim the stocking to a length so it will just be hanging inside the yoghurt container.
- Place the head on top of the yoghurt container and water regularly.
Notes:
To cover the yoghurt container, either draw a tuxedo on a piece of paper and glue onto the container. Alternatively you can make use of patterned tape.
Watch the video [6]
Part 2 – Workshop (Ryan)
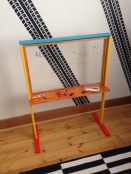
Acrylic Glass Art Canvas [6]
Building an acrylic glass art canvas for the kids, is a great way to encourage them to stimulate their creativity.
You will need
| Materials | Tools |
| Wood framework: 22mm x 44mm | Mitre saw |
| Quarter-round wood pole: 22mm x 22mm | Drill |
| Wood screws | Hole saw |
| Wood glue | |
| Acrylic board | |
| PVA paint (various colours) | |
Steps:
- Decide on the desired size of the Paint Easel e.g. 700mm x 500mm
- Cut a framework consisting of:
- 2x uprights (1.0M high),
- 1x lateral beam (745mm)
- 1x bottom beam (745mm x 300mm)
- 2x supporting feet (300mm)
- Secure the 2x lateral beams to the 2x upright beams using glue and screws.
- Secure the 2x feet to the base of the 2x uprights to provide stability.
- Using a hole-saw, cut out a few holes that can be used as cup holders for paint brushes and paint.
- Paint the framework to the desired colour considering water-resistance and weather-proofing.
- Attach the acrylic glass using a strip of silicone sealant to the wood frame.
- Place a strip of quarter-round wood to finish off the front of the frame.
Watch the video [6]
Part 3 – Décor (Elle)
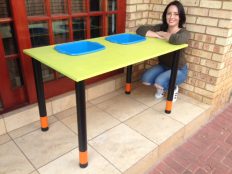
Toy Storage Table [6]
To help keep the kids room organised, build them a table that doubles as a toy storage area.
Material List:
| Materials | Tools |
| 2000mm x 700mm plywood | Power drill |
| 16mm wood screws | Sander with 120 & 180grit paper |
| Colourful Paint and Primer | Jigsaw |
| Paint tray and roller | Clamps |
| Paint brush | |
| 4 x metal table legs | |
| Spray paint with 2-in-1 paint and primer (for metal) | |
| Drop sheet | |
| 2 x Plastic containers |
Steps:
- Sand the 2000 mm x 700mm plywood with a sander and 120 grit sandpaper, then smooth with 180 grit paper, once the surface and edges are smooth, mark out the placement of the 2 x containers at the top of the plywood piece.
- Drill a hole big enough to allow for the jigsaw blade to pass through. Cut out the same shape as the containers using the Jigsaw, once the “container shape is cut out of the wood, smooth the edges with sandpaper.
- Lay out drop sheet and paint the table in a fun colour. Start with a primer and once dry, apply two coats of your chosen colour.
- For the legs, tape off sections and use a spray paint with built-in primer to add a pop of colour.
- To attach the legs to the table top, place the legs upside down, on the underside of the table-top, and secure with wood screws.
- Turn the table upright and place the plastic containers in the cutouts of the table to hold the toys.
Watch the video [6]
Décor Tips
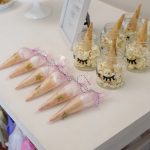
Unicorn themed kids party [6]
If you are looking to create a unique kids party, multi-award winning blogger Karen Kelly of LOVILEE has a few tips and tricks up her sleeve.
 [14]
[14] 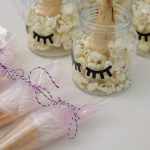 [15]
[15] 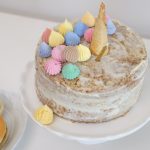 [16]
[16] 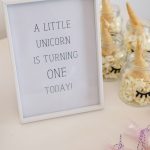 [17]
[17] 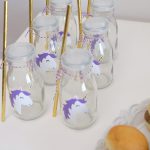 [18]
[18] 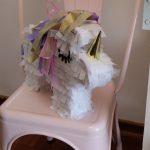 [19]
[19] 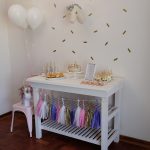 [20]
[20]
For more inspirational ideas visit Karen Kelly’s blog lovilee.co.za [21]
Watch the video [6]
