 [1] [1] |
Follow @BuildersFan |
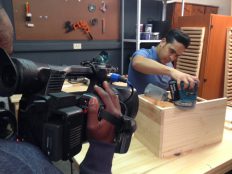
In this week’s episode of Home Made Easy, we celebrate South Africa’s diverse heritage. Tanya looks at must have indigenous plants, while Ryan builds a biltong dryer and Elle hits proudly SA on the head with nail-string art.
Part 1 – Tanya
Tanya’s indigenous must have plants [6]
– Vygies
– Juncus effuses
– Succulents: Haworthias, Gasterias, Sansevierias
– Portulacaria afra (Spekboom)
Tanya’s Chickpea & Spekboom salad [6]
What you need
- 2 400 g cans chickpeas, drained and rinsed
- 250g baby tomatoes
- 2 Avos, peeled, pitted and sliced
- Half an onion, sliced and blanched
- Feta cheese
- 2 Handfuls spekboom leaves, rinsed
- Salt and pepper to taste
- For the dressing, mix together third cup olive oil, 3 T white wine vinegar, 1 T honey, 1 T smooth mustard, ground black pepper, sprigs of flat leaf parsley roughly torn.
How to make it
- Remove the chickpea shells and place in a salad bowl with the tomato, avocado, onion and Spekboom leaves and pour over the dressing.
- Lightly mix and allow to rest for 2 to 3 minutes before serving, sprinkled with salt, to taste.
Watch the video [6]
Part 2 – Workshop (Ryan)
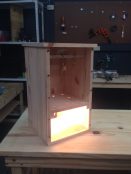
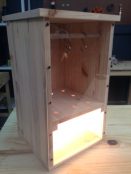
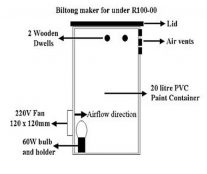
Biltong Dryer [6]
You will need:
| Materials | Tools |
| Wood: Pine boards – 19mm, Pine strips – 20mm x 20mm | Mitre |
| Wood screws: 35mm | Jig saw |
| Wood glue | Drill |
| Perspex panel: 300mm x 500mm | Hole saw / Forstner bit |
| Light bulb & wiring | Corner jig |
| S – hooks | |
| Dowel stick rods | |
| Computer fan – 220v (120mm x 120mm) | |
| Hinge |
Steps:
- Determine the size of the Biltong Dryer you desire and cut the wood and perspex to size at Builders: e.g. 300mm x 500mm x 300mm
- Mark and drill pilot holes for the entire box, allowing the lid to be removed freely or add a hinge as an optional addition.
- Secure only the base, the back and right side of the dryer before completing the enclosure.
- On the right inside of the dryer at 30mm from the top, mark 2-3 pilot holes for the dowel rods.
- Drill half-deep holes to receive 2-3 dowel rods as desired and secure with a water-based wood glue. Repeat on the opposite left side. Secure the left side to the rest of the dryer as before.
- On the back of the dryer, cut out an opening to receive and attach a small electric fan. Wire up as per manufacturer instructions.
- Mount a 40W-60W light bulb on the side or base of the dryer.
- Optional: Above the fan and light bulb, secure a removable shelf with pre-drilled ventilation holes using a hole saw or Forstner bit.
- Place the Perspex panel on the front of the dryer; mark and counter-sink pilot holes in order to secure to the dryer using wood screws.
- Complete the top of the enclosure with a wooden piece that is slightly larger than the rest of the dryer with pre-drill ventilation holes. Optional: attach the top of the dryer using a hinge.
- Finish off the dryer by oiling with a natural vegetable-based oil that is non-toxic to the food you will be drying and enjoy.
Watch the video [6]
Part 3 – Décor (Elle)
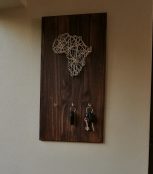
Nail string art [6]
Material List:
- A piece of timber
- Pack of medium length nails
- A hammer
- Saw tooth hanger
- 3 cup hooks
- String or cotton ( coloured optional)
- A printed picture of the African continent outline
- Heritage contact adhesive
- Wood sealant of choice
Steps:
- Sand and apply a tinted wood sealant of your choice to the wood. Another option is also to paint the wood. Allow to fully dry.
- Place it on the board to where you see fit. Once you are happy with the placement use a light spray of heritage contact adhesive to hold the image in place.
- Using the nails and hammer start to “outline” the shape of the “African continent” leaving about 1 cm between each nail.
- Once the nails are firm in the wood and follows the shape of the African continent, remove the paper by tearing it away.
- Tie the end of some string on one nail and pull across the centre to another nail on the other side and hook the string around. Continue across to every nail, until each nail is occupied by string and the string fills the interior of the African continent shape.
- Add and secure 3 hooks below the nail string art to use as a key holder and hang on the wall.
Watch the video [6]


